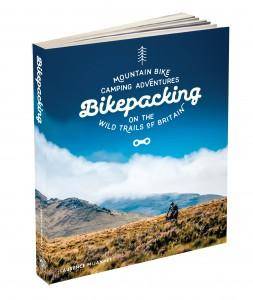
Laurence McJannet, author of our new BIKEPACKING book, tells us about what kit you need (or don’t need) for this fantastic activity.
As with any new niche in cycling – be it cross-country, trials, all-mountain, downhill or enduro – the industry has certainly been quick to embrace bikepacking.
With a view to creating modern bikes that are capable of hauling kit and carrying a rider in relative comfort over long distances and varying terrain, the industry now boasts specific ‘backcountry’, ‘gravel’, ‘drop-bar adventure’ and ‘fat’ bikes. Each is a variation of a traditional mountain bike or cyclo-cross bike, and tends to be rigid (i.e. no suspension either front or back) to make the bike more efficient on longer journeys while the ‘fat’ bike features balloon-like tyres and reinforced rims for increased stability and traction (they were originally developed for riding in snowy or sandy conditions). The fat tyres also provide some suspension in their own right. The availability and innovation of fat bikes, soft bags and other gear is beginning to popularise a sport that is still in its infancy and to lend it recognition.

But don’t think that you’ll need to spend big to get into bikepacking. If you already own a bike that can be ridden off-road, then you are ready to head for the hills. If you go camping, however infrequently, the chances are you already own much of the equipment you’ll need, and you really don’t need very much. An alternative is to hire the full kit, including a modern fat bike, and have it delivered to the start of your adventure, a service offered by Adventure Pedlars.
Through experience you’ll figure out what would be worth investing in, in terms of bike components, clothing and camping kit. After your initial forays close to home you may want to strike out further afield, ride faster, further and for longer, take on more challenging routes or camp later in the year.
Here are a few ideas for kit that will make your life easier and may make your ride and night’s sleep more enjoyable.
The bike:
The best bike for bikepacking is the one you already own. You don’t need a frame with eyelets or rack mounts for panniers, and even a road bike can be fitted with wider, more robust tyres to cope with canal towpaths and paved bridleways. A hybrid (a compromise between road and mountain bike) can cope with most rides too, though a proper off-road hardtail (knobbly tyres and front but no rear suspension) will give you more scope for planning longer, more technical rides. I find there’s no better bike than a rigid hardtail, the original mass-produced mountain bike, and the kind that has been left neglected in many people’s garages for a decade or more. With no suspension forks to compress, you don’t have to worry about your tyre catching a bag slung under your handlebars. For the same reason a full suspension rig is probably too much bike for most bikepacking adventures, unless you have dedicated frame bags. Too many moving parts can be problematic when you have luggage slung under the front, centre and back of the frame. Big-wheeled bikes (with 29in or the new ‘standard’ 650b wheels) are great for manoeuvrability but can have limited clearance for hanging luggage slings under bars and seat-posts.
Carrying things: You’ll need a backpack of some kind, around 30 litres is perfect, and ideally with double straps rather than a messenger bag with a single strap. Try to keep as much load off your back as possible, though a backpack is ideal for carrying tools, hydration, cameras and other items you might want regular access to. You’ll need at least one bag attached to the frame to carry your overnight kit, though two or three spread evenly across the bike work better. Knowing the British weather it’s best that these are waterproof (drybags are available from most outdoor retailers and come in a variety of sizes, with loops, eyelets or straps to give you loads of mounting options). However, if it’s the middle of a dry dusty summer a bin bag might get you through (it worked for me on my first adventure ride). Bungee cords, Velcro or adjustable straps will keep them in place, but I’ve seen cord, string and even plumbing clips do the job just as well.

Sleeping:
A simple bedroll or mat and sleeping bag will do. Don’t worry if it’s not a down or three-seasons bag; whatever you have will do for now. Sleeping mats are light but can be cumbersome to carry – though you can strap them under your bars or saddle if you have room. Spare clothes in a dry bag or bin bag make a luxurious pillow.

Eating/drinking:
Take food that doesn’t need cooking at first, or eat before you go. If your first adventure rides are near your home you can have breakfast when you get back. Two 750ml water bottles should be ok for short rides.

Fixing things:
Whether it’s for you or the bike, there are certain remedies you shouldn’t be without. A torch is always useful, a simple tool kit, pump, tyre levers and spare inner tubes will keep you on the move. A basic first aid kit and phone will let your loved ones sleep a little easier – remember to tell them where you are going and when you’ll be back.
Clothing:
Unless the forecast guarantees dry weather, take a waterproof jacket. It needn’t be a cycling-specific cut; you just need something to keep you dry until you can find shelter to make camp. Remember to bring a number of extra layers. Sleep in what you wear during the ride, and add layers as you need to. Woolly hats are invaluable, as is a spare pair of socks. Merino wool base layers, and a down jacket or gilet, pack down small but provide bags of insulation. A cycle-specific waterproof jacket will keep you drier and more comfortable for longer on the bike. Waterproof shorts or trousers could be wise too, as well as padded cycle shorts. A camping stove and pan with gas canister (or all-in-one), ceramic mug, fork and spoon – hot food and drink add a whole new dimension to wild camping, and are the simplest way to make it more enjoyable. My favourites are
Alpkit’s BruKit all-in-one and the MSR Pocket Rocket stove. A tarpaulin shelter (generic ones are fine but most camping-specific ones have reinforced eyelets for pegging out – again Alpkit make particularly good ones) and pegs will give you loads of options to help stay dry. A proper breathable bivvy bag wicks away moisture and keeps you more comfortable than a survival bag. A Camelbak or similar water bladder for drinking on the move. Oh yes, and a hip flask…
Bike accessories:
A handlebar harness for mounting a drybag under your bars. You can usually fit a 12 or 16 litre bag under there, with plenty of space for a stove, food, bivvy and tarp. A mid-frame bag to hang under the top tube (if you have a full suspension frame you may need a tailor-made one to make room for the shock). A saddle sling or bag to fit another dry bag. There should be space to get your sleeping bag and even a spare foldable tyre in here. Alpkit, Apidura and Wildcat Gear all make great, dedicated waterproof frame bags. Adjustable bottle cage mounts – with a frame bag in place there won’t be much room for the bottle cage in its usual place. These let you mount your water bottle underneath your downtube, on your fork legs, bars or seat-post – SKS make a great one that will fit around all but the fattest frame tubes. A top-tube or stem-mounted ‘fuel cell’ or ‘gas tank’ – perfect for mid-ride stacks or compact cameras. A wider ratio cassette for more flexible gearing under load – the Wolfstooth 42T cog is a great example. A spare foldable tyre, as a burst sidewall can put an immediate end to your ride (though a small cut-up section of milk carton between inner tube and tyre side wall can get you home in an emergency). Ergonomic bars, grips and saddle will keep you comfy on the trail for longer. Look for bars with a greater sweep than usual (such as the Jones Bend H-Bar or On-One’s Fleegle bar). Try ‘stubbie’ bar ends of the likes of Ergon’s grips for multiple hand positions.

Tents and tarps:
A microlight one- or two-man tent or specific shelter. Ditch the tarp and bivvy and you’ll be able to carry on bikepacking right through the year (well, almost!) Most are small enough to be slung under your handlebars. I’ve used the Vango Tempest, but the MLD Trailstar and Golite Shangri-La are well worth a look. Or for unforgettable forest camping you could try Tentsile’s range of suspended tree tents. A head-torch is much more practical than a handheld one. Even during a prolonged dry spell I would take an orange survival bag, (available from many specialist outdoor shops), to protect my sleeping bag from rips and tears as much as bad weather. It’s another layer, no matter how uninsulated, with which to trap warm air, and it will keep moisture and rain at bay too.

With thanks to Tentsile for the loan of their Stingray…
Other bits:
Mobile phone, spare battery and spot tracker, dehydrated foodstuffs (any food you add hot water too tends to be compact and light but very satisfying), mid-ride snacks (fig rolls, flapjacks, jelly babies, energy bars or gels all work well), tea, coffee (a moka pot or individual filters) or hot chocolate sachets, and porridge sachets, the breakfast of champions.
Investing in new kit as and when you can will inevitably lighten the load you have to carry and consequently make your bike easier to handle and therefore more enjoyable to ride. Another option is to make sure key pieces of equipment serve more than one purpose. A heavyweight sleeping bag can just be used for sleeping, while a lighter bag and down jacket have the same result, with the jacket useful during the day too.
Find out more about the bikepacking book here.